What Is a Clipping Path? (And Why Your Product Photos Probably Need One)
You have seen it a thousand times without noticing: a sneaker floating on pure white, a watch with edges so clean they look sliced with a razor. Somebody made those edges. More often than not, the technique behind them is a clipping path.
So, what is a clipping path? Let's break it down without the jargon.
What Is a Clipping Path?
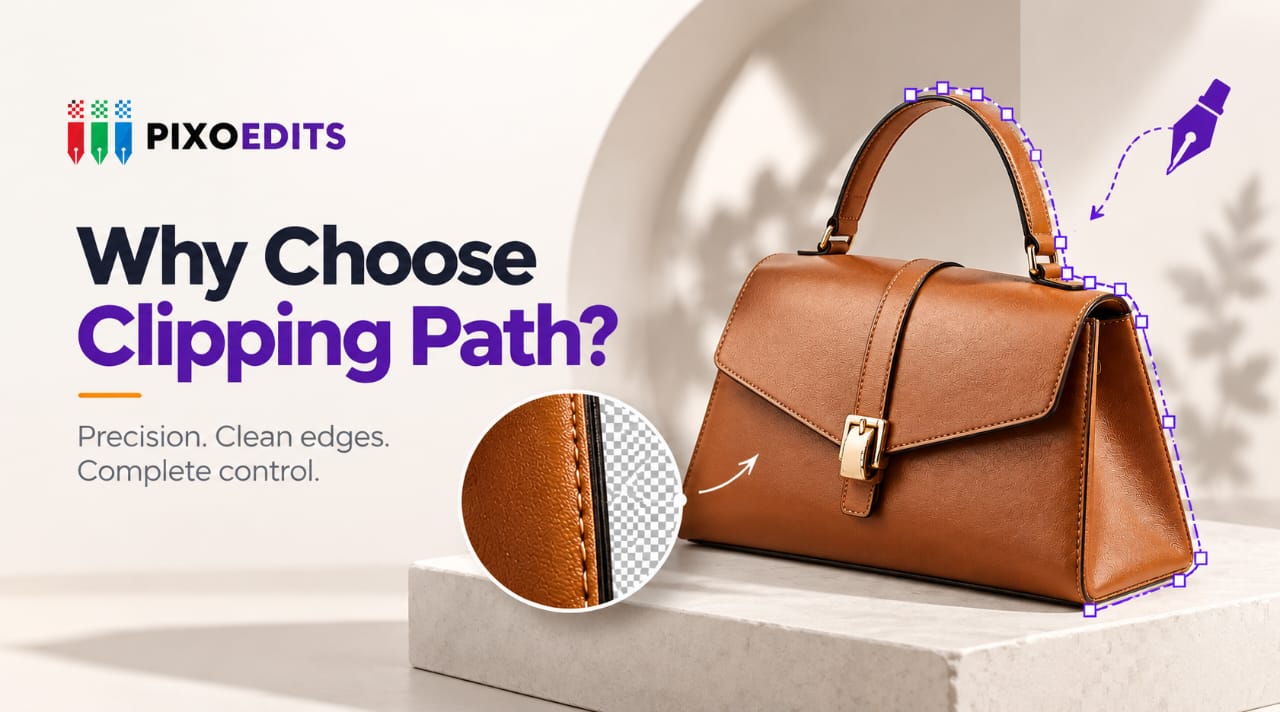
A clipping path is a closed vector outline drawn around the part of an image you want to keep. The main path defines the outer edge of the subject, while additional sub-paths can be used to remove gaps or areas inside the product. Everything outside the defined paths can then be hidden, deleted, or replaced with something else, such as a white background, a colour, or transparency.
Editors draw it with the Pen Tool in Photoshop by placing anchor points along the edge of the subject and bending the line between them into curves. Because the path is vector-based (built from maths, not pixels), it stays razor sharp whether the image ends up on a phone screen or a printed catalogue.
How a Clipping Path Actually Works
The process is simple to describe and surprisingly slow to do well:
- The editor zooms in tight and places anchor points along the edge of the product.
- Curve handles are adjusted so the line hugs every bend without wobbling.
- The path is closed, named and saved, then converted into a selection.
- The background is removed, replaced or left transparent, and the path can stay embedded in the file for later use.
Where Clipping Paths Are Used
Anywhere a product needs to be separated cleanly from its surroundings. Online stores use them to meet marketplace rules that ask for pure white backgrounds. Print designers use them to drop products into brochures and packaging layouts. Advertisers use them to build composite images, where one product sits in a totally different scene.
Photographers use them too, mostly for one reason: consistency. When 400 product shots need to look like they belong to the same brand, a clean cutout is where that starts.
What Separates a Good Clipping Path From a Bad One
Not all paths are equal. Here is what a trained eye looks for:
- Smooth curves with no jagged corners or little bumps.
- The right number of anchor points. Too many make the edge lumpy, too few cut corners off the product.
- A tight edge that does not chew into the product or leave a white halo around it.
- Inner cut-outs handled properly, like the gap in a handle or the space between chain links.
Complexity matters too. A box or a bottle needs a simple path. A bicycle, a wire basket or a necklace may need dozens of sub-paths, and that is where hours of careful work go.
Why Human Hands Still Matter
Yes, one-click background removers exist, and for a quick social media post they are perfectly fine. But they guess. They cannot tell whether a dark patch under a shoe is a shadow to keep or part of the shoe. They do not know that the see-through part of a glass bottle should stay see-through. They also behave differently from one image to the next, which is a headache when you need 500 images to match.
A human editor looks at a product and understands what it is. That is the difference between a cutout that is technically done and one that is genuinely ready to publish. It is not about being against automation. It is about using the right tool for the job.
The Bottom Line
A clipping path is one of the oldest tricks in image editing, and it is still one of the most useful. If your product photos are the face of your brand, the edges are worth getting right.
 Quick Response
 Secure & Confidential